


Link to the full version of the project on GitHub:
Github TokenJWTProject
What is JWT?
JWT (JSON Web Token) is an open standard (RFC 7519) designed for securely exchanging information in the form of a JSON object. With JWT, messages are digitally signed, ensuring that the enclosed information can be trusted. This secure exchange allows for the reliable and tamper-proof transmission of data.
Link to the standard documentation: RFC 7519
WIKI: JSON Web Token
The most common use case for JWT is authorization. Once a user logs in, a token is generated and included in each subsequent request. This token serves as proof of authentication, granting the user access to specific routes and allowing them to make requests that are restricted to authenticated users. By including the JWT token in subsequent requests, the user can securely access protected resources and perform authorized actions within the application.
Each JWT token consists of three parts:
Header: This part of the token contains information about the algorithm used for signing the token and the type of token itself. It typically includes the token’s type, which is “JWT,” and the algorithm used for signing, such as HMAC, RSA, or others.
Please note that the header is encoded in Base64Url format, but it is not encrypted. It simply provides metadata about the token’s structure and signing algorithm.
{
  "alg": "HS256",
  "typ": "JWT"
} |
Payload: The payload contains the actual data or claims associated with the token, such as an identifier and expiration date. It also includes additional custom data and can define the token’s limited lifespan.
{
  "sub": "1234567890",
  "name": "Daenerys Targaryen",
  "iat": 1516239022
} |
Signature: The signature is the third and final part of the JWT token. It is generated by combining the encoded header, encoded payload, and a secret key using the specified signing algorithm (e.g., HMAC, RSA). The signature ensures the integrity and authenticity of the token, as it can only be verified using the same secret key.
JWT parts have standardized sets of fields. You can see a complete list here: wiki
Example of a finished token: Base64URL(header) + Base64URL(payload) + Base64URL(signature)
JWT utilizes the HMAC algorithm for signing, where a single key is used. Alternatively, you can also employ the RSA algorithm, which involves a public/private key pair for signing and verification purposes.
I suggest some useful sites for your convenience in working with JWT:
– Check / Debug / Encoded / Decoded JWT
https://jwt.io/
https://www.jsonwebtoken.io
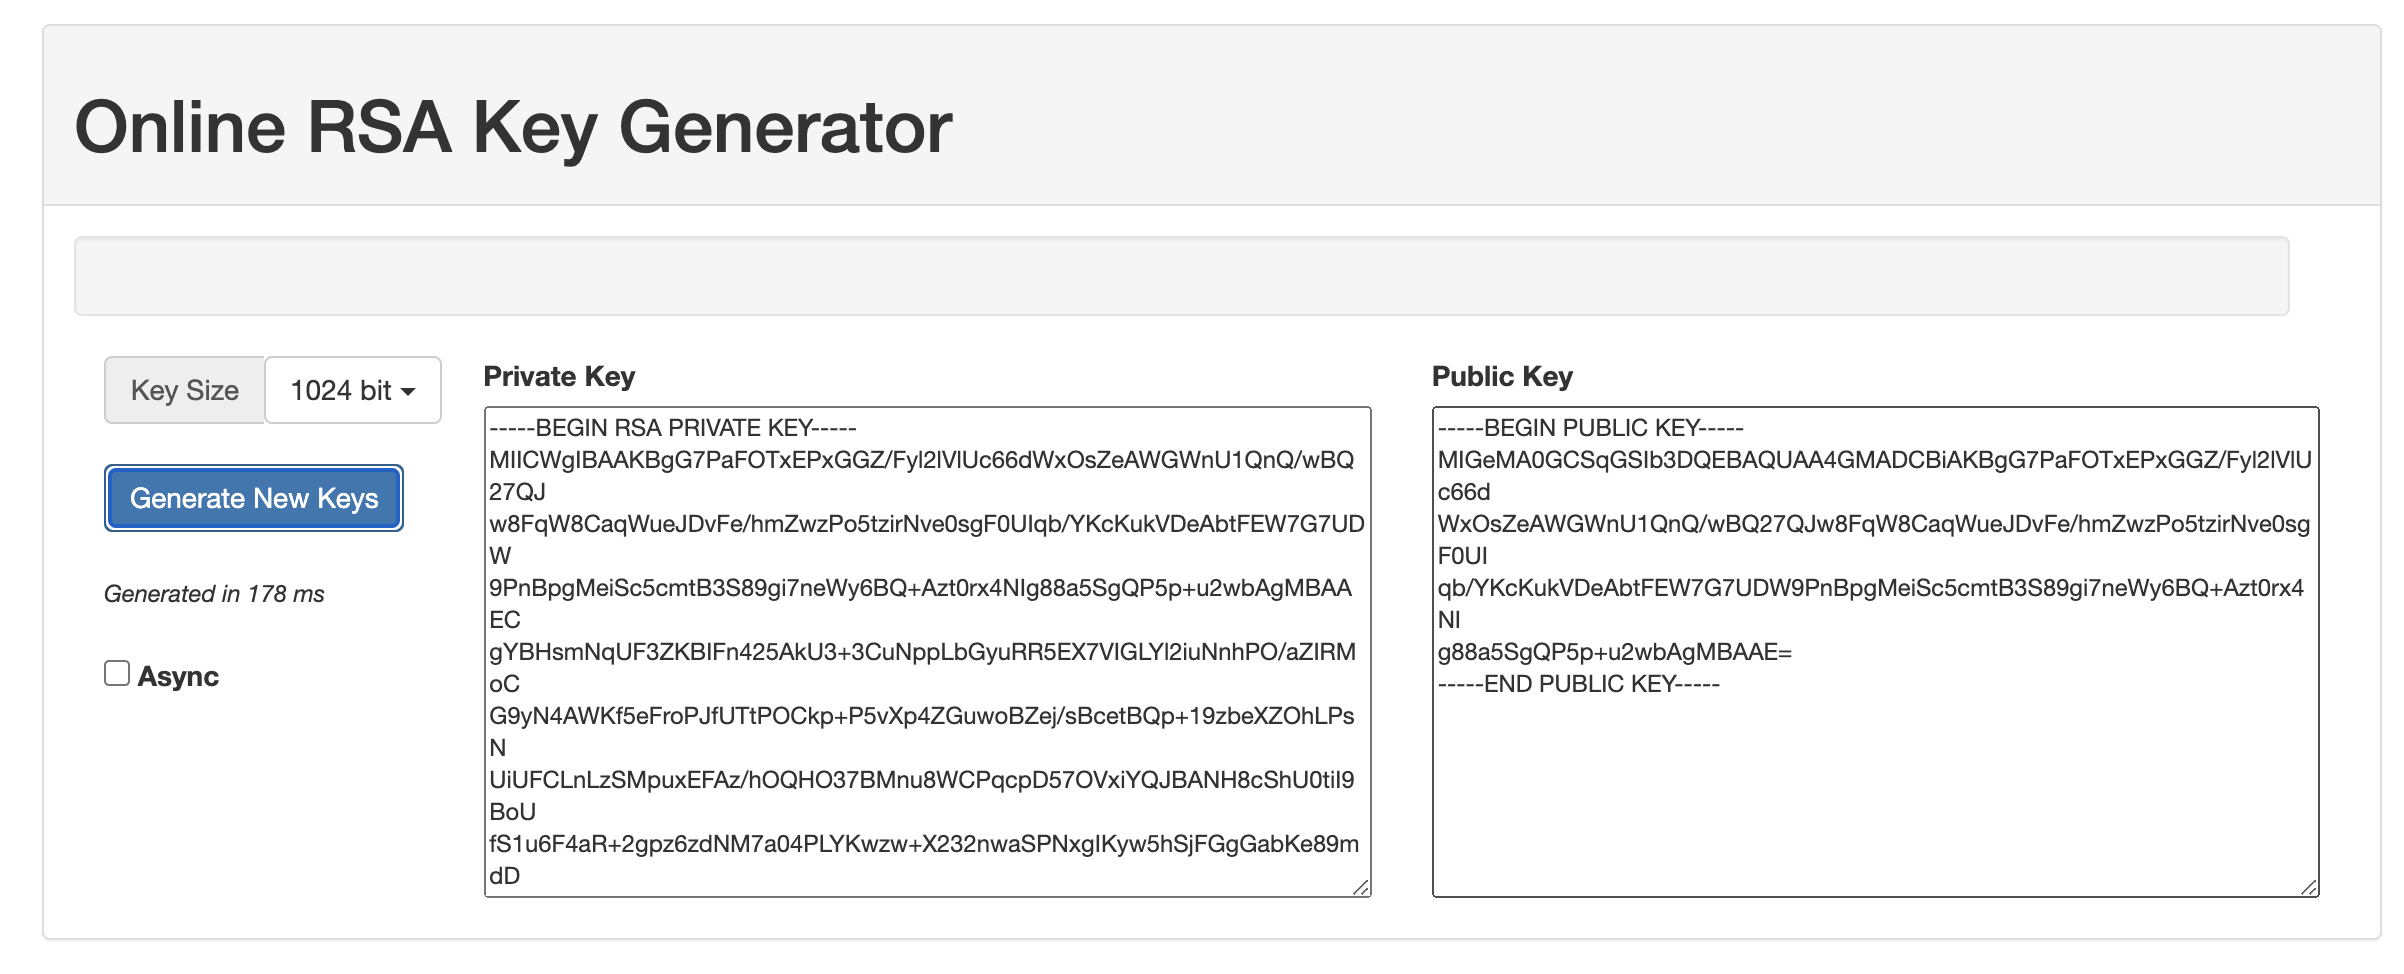
– Online RSA Key Generator
https://travistidwell.com/jsencrypt/demo
Used:
| Spring Boot | JSON Web Token | REST web сервис | Swagger | Junit 5 |
To accomplish these tasks related to working with JWT, follow the steps outlined below:
- Generation of a key pair (public/private): Use a cryptographic library or tool to generate a public/private key pair suitable for your chosen algorithm (e.g., RSA). Store the keys securely.
- Load keys from a file: Implement functionality to load the public and private keys from a file within your application. This allows you to securely access and utilize the keys during token generation and verification.
- Generating JWT token directly: Utilize the loaded private key to generate a JWT token programmatically within your application. Use a JWT library that supports the desired algorithm for signing (e.g., HMAC or RSA) and include the necessary claims and information in the token.
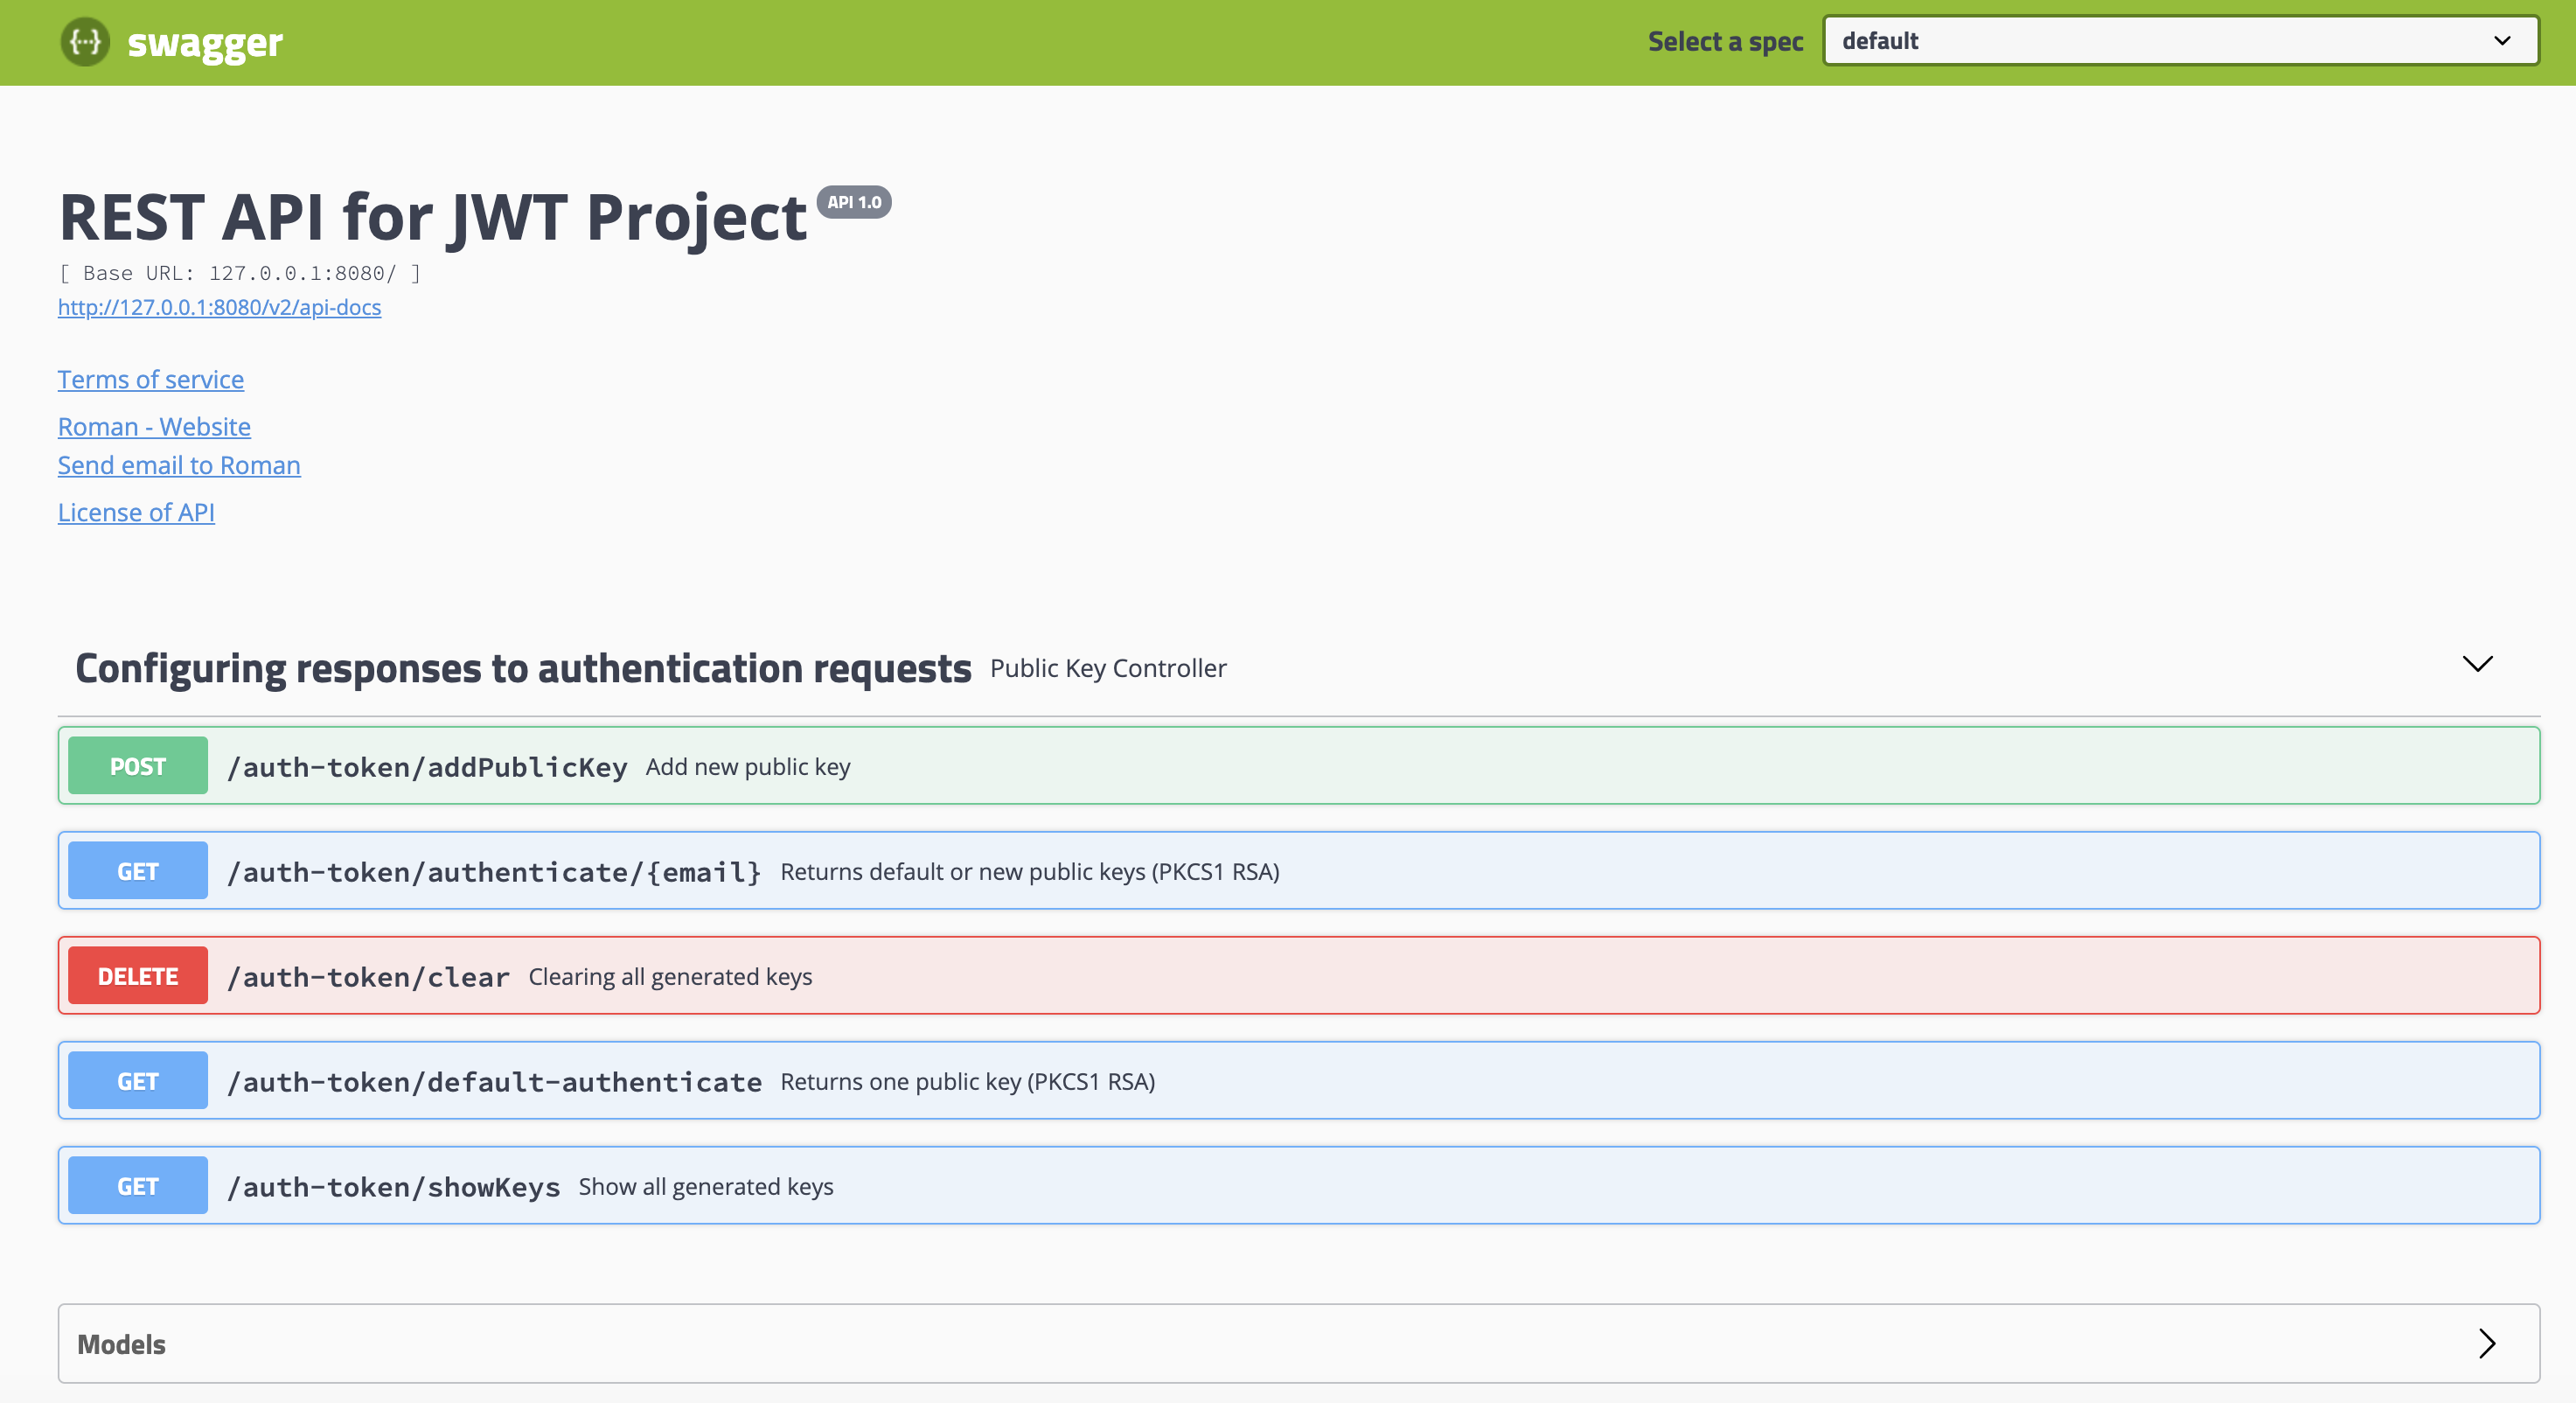
- Deploy a REST web service with a public key (GET request): Set up a RESTful web service that exposes a public key endpoint. This endpoint should respond to GET requests and provide the public key required for token verification by external parties. Securely handle and serve the public key.
- Write several tests in JUnit: Develop JUnit tests to ensure the correct functionality of your JWT-related code. Write test cases to cover token generation, verification, loading keys, and any other critical aspects of your implementation. Test both success and failure scenarios to ensure robustness.
- Launch the project from the console: Use a build and deployment tool such as Maven or Gradle to package your application into a runnable format (e.g., JAR or WAR). Launch the project from the console using the appropriate command for your chosen tool. Monitor the console output for any errors or warnings.
By following these steps, you will be able to perform key generation, load keys, generate JWT tokens, deploy a RESTful web service with a public key endpoint, write JUnit tests, and launch your project from the console successfully.
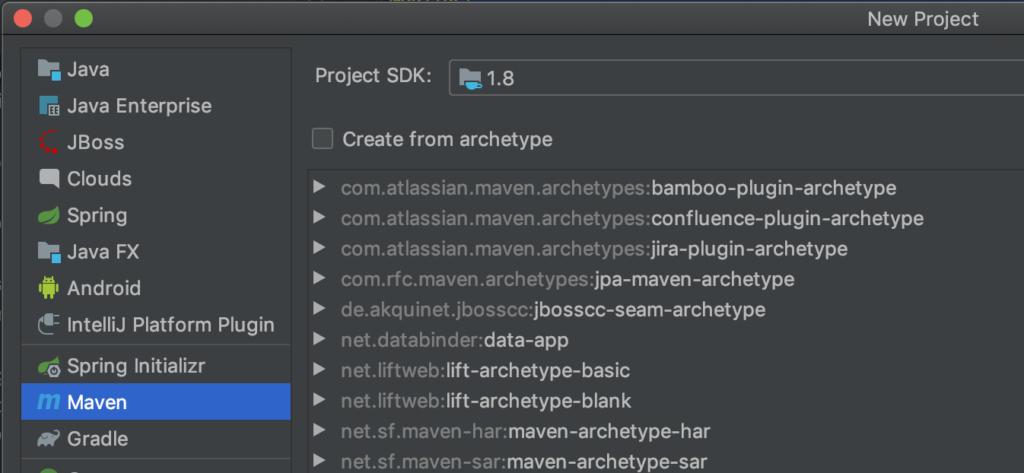
To create a Maven project and include the required dependencies in the pom.xml file.
Your Maven project is now configured with the necessary dependencies in the pom.xml file. You have the flexibility to further customize the project and add additional dependencies as needed. Maven will handle dependency management and resolution, allowing you to easily build, test, and package your project.
The MIT project will be used as the main library to work with JWT ref on GitHub: auth0/java-jwt
com.auth0 java-jwt |
In the given example, let’s explore two options for loading keys:
1. Loading a prepared pair from a file: In this approach, you can generate a public/private key pair using a cryptographic tool or library and save them to separate files. At runtime, your application can read and load these keys from the files for JWT signing and verification.
2. Generation of keys at the moment of application’s work: Alternatively, you can generate the public/private key pair dynamically within your application. This can be achieved using cryptographic libraries that provide key generation functionalities. The generated keys can then be used for JWT operations during the application’s runtime.
Both options offer flexibility depending on your requirements. If you have a fixed key pair that doesn’t change frequently, loading from a file can be suitable. On the other hand, generating keys at runtime provides dynamic key management capabilities. Choose the approach that best aligns with your security needs and key management practices.
For this we will prepare a Public / Private PKCS8 format pair, RSA algorithm (1024, 2048), encoding PEM. I will use an online generator: Online RSA Key Generator.
These keys are in PKCS1 RSA Cryptography Standard. Private key must be converted to PKCS8 RSA Cryptography Standard. One command in the terminal. Where private_key_file – path to locally saved file.
openssl pkcs8 -topk8 -inform PEM -outform DER -in private_key_file -nocrypt > pkcs8_key |
The project is set up, we can move on to writing code.
Project structure:
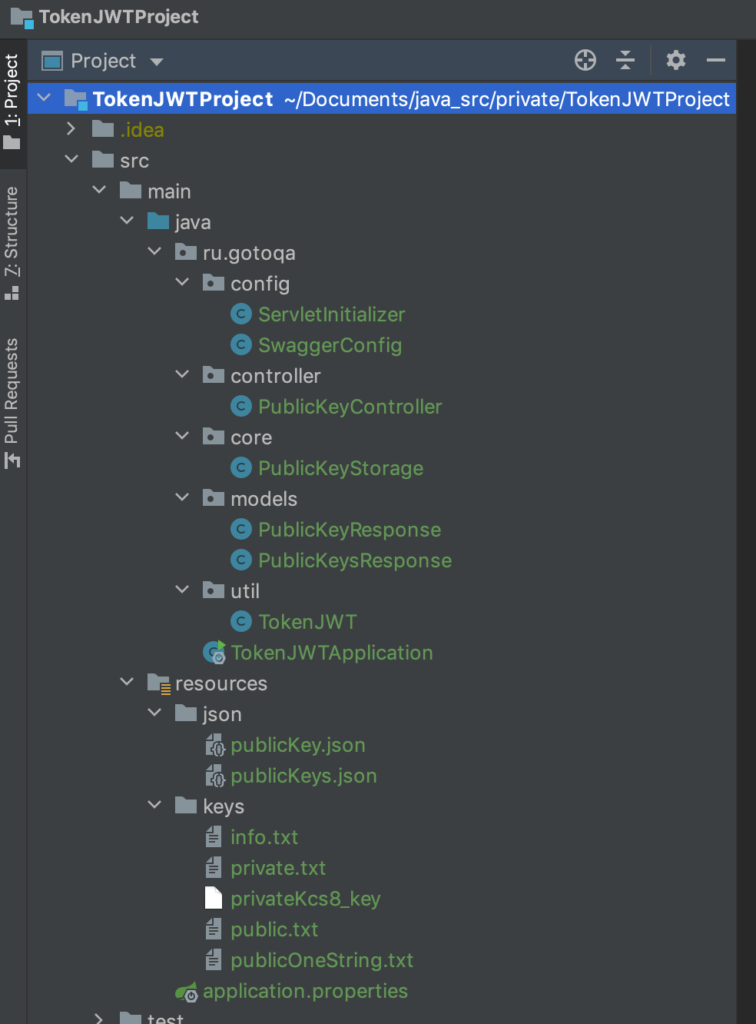
- ru.gotoqa.config: This directory contains the Swagger configuration classes, allowing you to configure and customize Swagger for your project. Swagger provides comprehensive documentation and testing capabilities for your RESTful APIs.
- ru.gotoqa.models: This directory serves as a storage location for POJO entities designed to represent JSON data. It provides a structured way to handle JSON objects and facilitates seamless integration with JSON-based APIs.
- ru.gotoqa.controller: In this directory, you will find the implementation of a RESTful web service. The controllers define the API endpoints, handle incoming requests, and orchestrate the logic required to process and respond to client requests.
- ru.gotoqa.core: This directory houses the core logic for preparing and storing answers. It encapsulates the business logic and functionality required to process data and generate appropriate responses for client requests.
- ru.gotoqa.util: The util directory serves as a catalog for secondary methods. It contains utility classes and helper methods that provide common functionality and support other components of the project.
In conclusion, JSON Web Tokens (JWT) provide a powerful and secure method for exchanging information in JSON format. By following the guidelines and implementing JWT in your applications, you can enhance security, enable seamless authorization and authentication processes, and ensure the integrity of data transmission. With a solid understanding of JWT and its implementation, you are well-equipped to leverage this technology to protect your applications and provide a seamless user experience.
Link to the full version of the project on GitHub:
Github TokenJWTProject